Mooring on a Charter
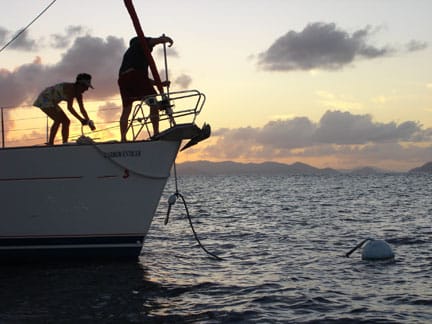
Most developed chartering locations throughout the world have established zones in which mooring balls have been permanently implanted. Most charter skippers utilize mooring balls due to their convenience and security, and because they prevent anchors from causing damage to coral reefs. Moorings are identified by buoys (mooring balls) that are attached by a chain to a device that is screwed into the ground, or concrete structure below. A mooring pendant also attaches to the buoy, sometimes with its own float for identification. The official color of a mooring buoy is white with a blue strip. Although other colors can be used in local areas. Some mark day moorings only. Ask your local base when you are there as to local colorings.
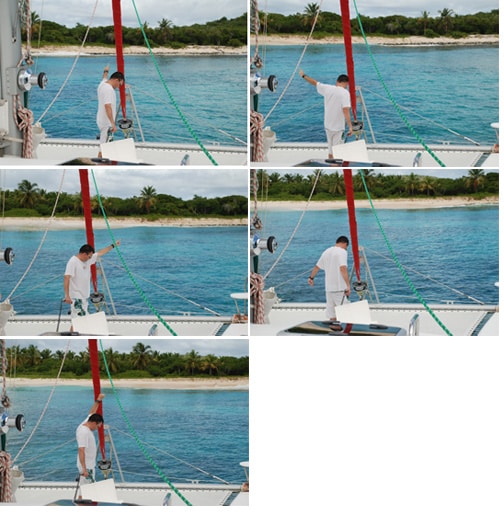
When mooring and anchoring the boat, it is important to establish a hand signal communication method between the people on the bow of the boat who are collecting the mooring ball and the helmsperson. The following photos illustrate this nicely.
- Arm up, finger pointing up – move ahead
- Arm and finger pointing left – turn left
- Arm and finger pointing right – turn right
- Arm down and finger down – reverse.
- Arm half up and first clenched – stop the boat in its place
- Arm out, hand open and wavering horizontal – take the boat out of gear
| Key point: Reversing the boat usually means chopping the dingy painter into little pieces by wrapping it around the prop. Try to remember to assign a crew member to the dinghy when coming into a mooring. The easiest way is to pull the dinghy either alongside or hard up against the stern of the boat before, mooring, anchoring, or coming into port. |
To moor the boat, maneuver upwind or against a current toward the mooring ball. Stop the boat when the ball is within reach of the bow crew, who grab the pendant with a boat hook. The pendant usually has an eye spliced into its end for placement over a bow cleat. When cleated, the boat is allowed to swing to leeward on the mooring. It often pays to wear rubber gloves when grabbing the pendant; they’re usually slimy and may have barnacles on board that can cut bare hands.
Some harbors (Gustavia in St. Bart’s for example) provide a second mooring pendant for the stern. A line connects the bow and stern pendants. Once the bow is secured, find the connecting line, and follow it hand over hand while walking toward the stern. As the connecting line is pulled short, it brings the second pendant up, and that is cleated at the stern.
The mooring lines are usually quite short, eliminating the large swing radius of anchors, so more boats can fit into the harbor area. Since they are very secure, once the pendants are cleated, there is no need to post an anchor watch unless the winds or swell reach the 35-knot range.
To cast off a mooring, start the engine and move slowly toward the mooring ball to relieve tension on the pendant. The bow crew removes the pendant from the cleat and releases it. When free of the mooring, the helmsperson allows the wind to move the bow clear of the mooring buoy, engages the propeller, and steers for a clear lane to open water.
When pendants are cleated to bow and stern, begin by casting off the leeward pendant, usually from the stern. Keep the propeller in neutral and allow this pendant to sink to avoid wrapping it in the propeller. When clear of the pendant, nudge the bow ahead so the forward pendant can be released, and allow the wind to push the bow away from any entanglements.
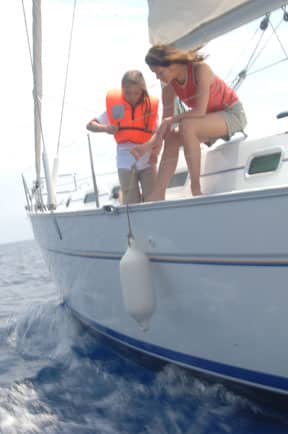
In tight situations, post crew members with roving fenders. These are to be placed in between your boat and other boats should the wind swing you into them.
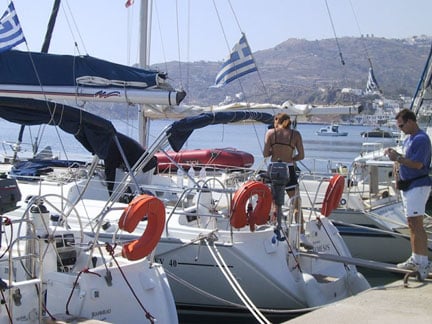
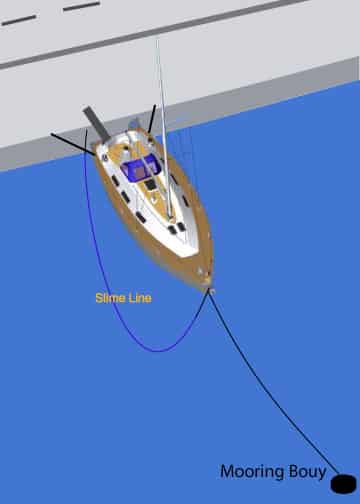
The Mediterranean Mooring is my favorite. This is named as such because many times in the Med you need to back your boat up to a very hard and unforgiving concrete wall at the same time as picking up a forward mooring buoy or dropping anchor – all at the same time as dealing with the wind wanting to push your boat around. Actually, once you’ve done it a few times it’s quite simple but for first-timers, it can be a bit daunting. We highly recommend that you take the NauticEd Maneuvering Under Power clinic and practice this a few times at home so that you are confident and proficient at maneuvering your boat in these types of conditions.
In the Med there is also “the slime line”. You back your boat up to that hard concrete wall, then on the wall, you’ll see a line dropping off the wall and into the water. This is the slime line. With the boat hook you pick up this line and hand over hand run it forward, trying not to cut yourself on the barnacles and trying not to think about the lack of holding tanks in Europe. Once you get it to the front of the boat you pull on the line. It is attached to a much thicker line that is anchored to the bottom 10 meters or so further out. Pull this line as taut as possible and wrap it around your forward cleat. This serves to hold your boat off the wall. At the same time, your crew should also tie the stern of the boat to cleats on the concrete wall. Adjust all the lines so that the boat is positioned close enough to step off but far enough away so that it can not touch the wall should a wake come rolling through.

