Sailing Vessel Preparation
Sometimes it is a good idea to get nasty stuff out of the way first.
The Head
The marine toilet is called the head because in olden times it was at the front of the boat. Basically, it works like this: the head pump brings water in from outside the hull, which flows into the bowl. Some deposits are made and the resultant mix is flushed away into a holding tank or back overboard. After the exit pump, a “Y” valve mounted close to the head in the bathroom cabinet or under the floorboards directs the wastewater to either the holding tank or the outside. Various valves must be turned or buttons pushed to direct the flow of inbound water and outbound effluent.
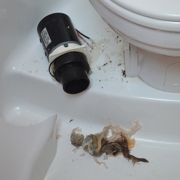
The worst thing about a marine head is that because of the size of the pipes and delicate pumps, guests unfamiliar with how things work will more than likely flush things that should not be flushed. This blocks up the head. Your game plan around the head needs to be education – education and more education or YOU will be stuck with a very nasty job.
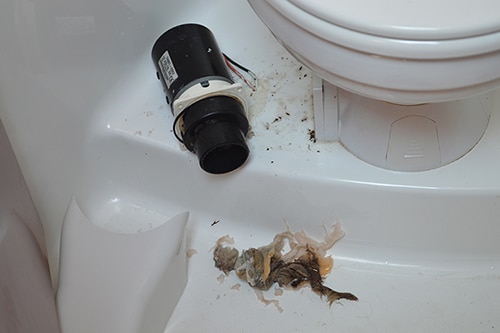
Nasty Nasty Job
The Head Pump
Some systems have a manual pump, some are electric. With electric systems, there will be a macerator, and an electric grinder, after the bowl. It chops everything into small pieces before moving it overboard or to the tank (as if your own body hasn’t ground it up enough—actually it is mostly for the toilet paper).
For manual pump handle systems, the physical pumping smushes the “stuff ” good enough before sending it to the tank or outside
Below is an animation of a manual pump system. Tap #1 or #2 on the animation depending on your body function.
Head Animation
If you want your regular crew to know this, below is a link to our blog post on this nasty topic. Send the link to your crew.
Somehow, seawater makes the smell of the entire system very unpleasant. So some boats are fitted with a fresh-water supply to the head pump. If this is an option to purchase for your new boat, go for it, but be aware that it will use up your onboard water supply quickly.
Some systems have an inline freshener for the supply of water. This is a really good idea.
For manual pump systems, use a head pump lubricator oil every now and then to keep the manual pump from squeaking and becoming overly tight.
The Waste Holding Tank
In the United States and most countries, it is illegal to pump out your head directly overboard anywhere within three miles from shore, in certain wildlife areas, and most definitely in all inland lakes and rivers. Consider our precious environment and use your holding tank. Only when way offshore should you consider dumping.
The holding tank has a vent that releases potentially dangerous gas. Thus when someone does ‘the do’, there is usually a brief unpleasantness outside.
You’ll find many charter companies overseas do not even have a holding tank or they falsely tell their clients that the tank is inoperable; shame on them for being environmentally irresponsible. In this instance, it’s best not to swim in the marinas where they operate!
When approaching land, always switch the “Y” valve to the “Holding Tank” position.
Chandleries (or Amazon) sell “Marine” tank fresheners, which is a must. Some are just chemical fresheners, while others contain chemicals (or enzymes) that break down waste in the tank, which is helpful for pumping out without clogs. Notably, you can use RV waste tank treatments as well, but first, check that it is environmentally safe for marine use and local marine regulations. Whichever is your choice, keep plenty on board, pour it into the bowl per instructions, and flush your tank after each outing.
DO NOT use any bleach products, which will degrade the rubber components very quickly. Don’t keep bleach products in the head area cabinets, as guests will tend to think they are doing you a favor and pour them into the head.
It is a good idea to pump out the tank often and whenever you have an opportunity to do so. Often the waste tank will fill up more quickly than most people realize, and a full waste tank (and unusable head) when sailing is unpleasant for everyone on board! When you pump the tank, flush lots of water back into the tank and then pump it out again.
Boat Owner Tip: when you’re finished sailing and leaving the boat for a day/however long – after you’ve pumped out, add waste treatment to the waste tank with 1 to 5 gallons (depending on tank size) of water. This helps keep the tank fresh and will help break down any remaining waste and residue in the tank. *Note: this is for regular seasonal use of the sailboat, whereas “winterizing” a sailboat’s holding tank is a different process.
Given that your entire game plan around the head is to not have people flush anything that should not be flushed, you need to supply a means to deal with those non-flushable things: Make available small plastic disposal bags in a dispenser mounted in the head area.
Head Instructions
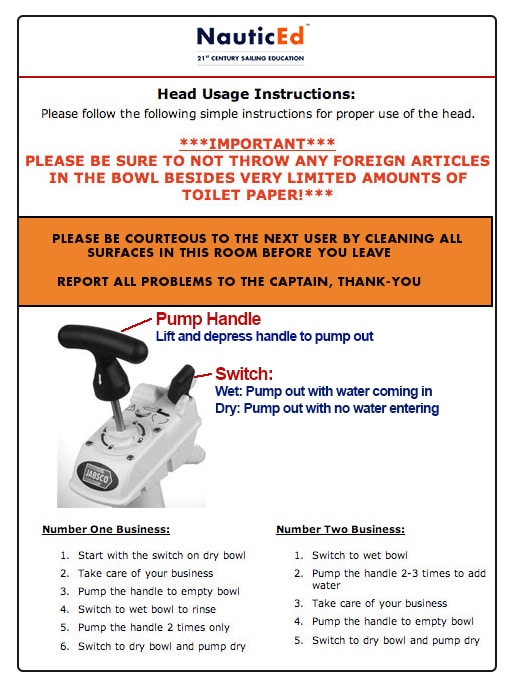
Here are some useful links for signpostings for your head. Save the PDFs, print them out, laminate them, and stick on the wall.
- Download a PDF of the pump handle version to print out/laminate and post next to the head.
- Download a PDF of the electric pump version to print out/laminate and post next to the head.
Crew Briefing Regarding the Head Use
Each marine head has unique operational characteristics, so making sure the crew understands your head is an absolute must. “Head indoctrination” is sometimes a bit embarrassing but unless you do it, you will inevitably find yourself later unbolting the head and cleaning out the nasties.
Here are some tips that will help you in regards to briefing the crew on the use of the head.
- Make certain everyone understands what kind of stuff may be deposited in this unit, and what kind of stuff may not. The general rule is that only things that you have first eaten or small amounts of toilet paper can go in the head. Large cleanup jobs require lots of flushing. Four squares of TP each flush max.
- Make sure to at least demonstrate how to rid the bowl of the nasties and how to pump or flush the bowl dry.
- Be cognizant of kids who somehow find large volumes of toilet paper fascinating.
- Encourage a lot of swimming.
Make Ready Your Boat for Safe Sailing
Stowing Items
“What is not on the floor will be on the floor.” I make this announcement to the crew each and every time we go below to ready the vessel. A bag placed on the settee will not remain there for long after the boat heels over. Drinks and food items not stowed properly in the galley will quickly turn into floor stew. Thus prior to pulling out of the slip, do a final check around to make sure everything is heeling immunized.
PFDs (Life Vests)
If not worn, PFDs need to be made accessible.
Horn
Your sound device needs to be readily accessible.
Ample Fuel, Water, and Food Supply
Of course.
Weather
The weather should be checked prior to sailing. You should also verify your ability to gather weather updates while on board.
Safety Equipment
See Chapter 11.
Lights
Ensure all navigation lights are in working order before heading out.
Engine
Check that you have sufficient fuel, oil, and coolant water.
Sails
Despite your eagerness to get out on the water and sail, it is a lot easier and safer to remove sail covers and prepare the sails while in the calm waters of the marina rather than in a rocking swell.
Food and Water
You must have enough based on how long you plan to be out. Don’t forget to bring extras for contingencies plus sufficient cooking gas. Refrigerators also need to be inspected.
Communications
Before heading out be sure you have working communication devices including a working VHF, cell phones, and radar reflector.
Hatches Closed
Always.
Don’t Wet the BedA car ferry passed us once while sailing in Greece. A few moments later two crew members came upstairs looking for the jokester who threw 15 buckets of seawater into their cabin through the side hatch. Rather, they found out that it was the wake from the ferry that perfectly (or imperfectly) did a crescendo through their open hatch and into their cabin. Sheets, blankets, clothing, bodies, and the mattress were soaked. |
Plan
Make a basic passage plan considering such things as intermediary dangers, current, wind direction, and approximate waypoints, charts ready, and file a float plan with friends or relatives.
Electrical and Instruments
On and working.
Docklines Set and Ready for Release.
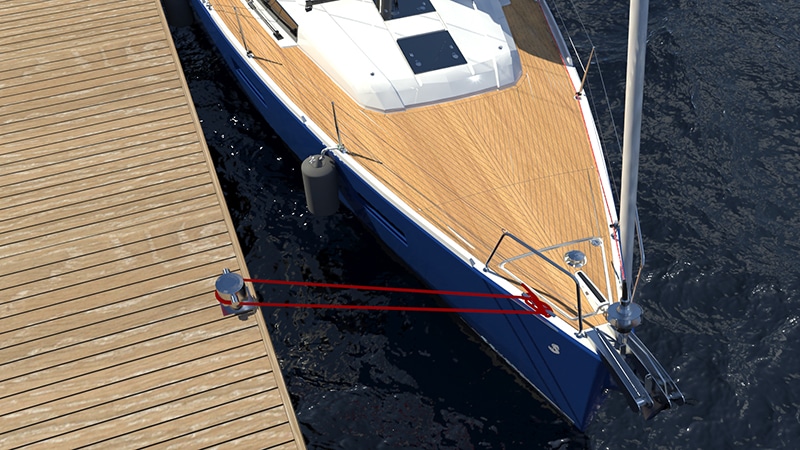
The dock lines prior to departure should be set where they run from the boat cleat to a half turn around the dock cleat and back to the boat where it is cleated to the boat. In this manner, when departing, the boat can be released from the dock while standing on the boat without the need to jump on the boat after release. The crewmember simply uncleats the return line on the boatcleat and pulls the line out from the dockcleat. It is imperative that the dock line has no knots in it so that it runs freely through the dock cleat when pulled. This method is not 100% mandatory each time, rather it is just good practice when possible.

