TOP 10 OVERLOOKED ANNUAL INSPECTION POINTS FROM A MARINE SURVEYOR
A guest post from instructor and marine surveyor Captain Jack Clayton. Learn more about Jack here, or visit his marine surveying website for more tips and advice!
1. Packing Gland/Dripless Shaft Seal
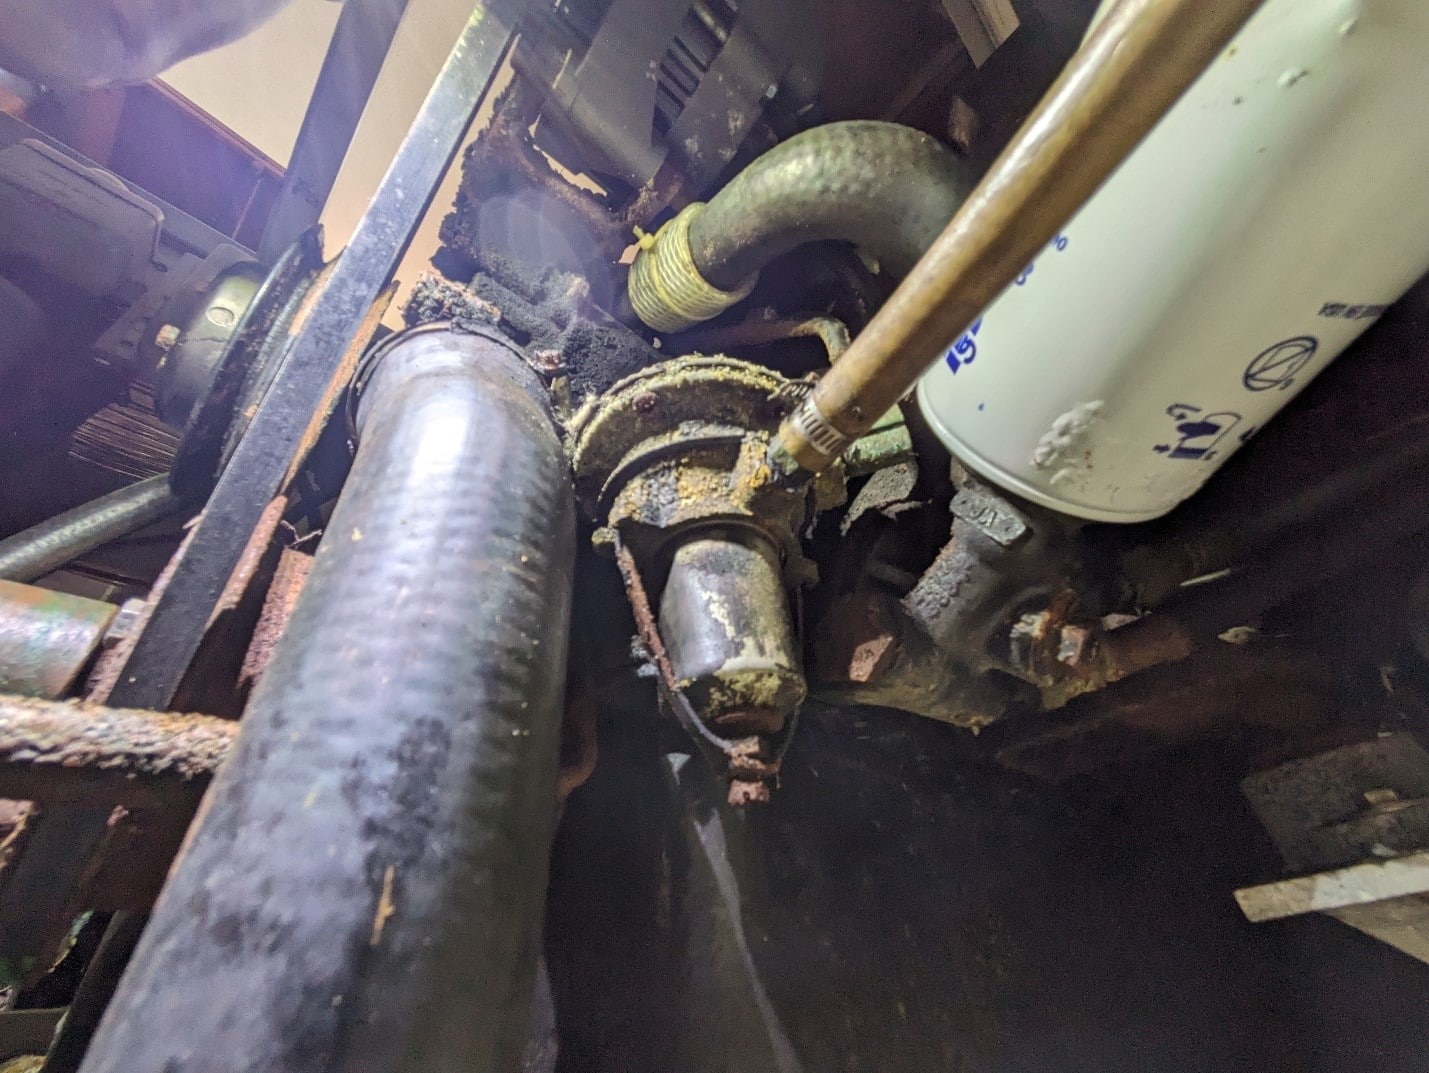
Sailors are notoriously prone to ignoring what’s happening in the engine bay. After all, it’s a sailboat—the motor is just there to meet insurance requirements, right? Well the packing gland is usually the easiest to ignore since it is tucked far behind the engine and can be difficult to access. Sometimes it’s literally painful; on my first sailboat, I had to hang upside down into a lazarette, and through a locker door while contorting around two different corners to access it! By time I was done, my head was a tomato and my legs were asleep.
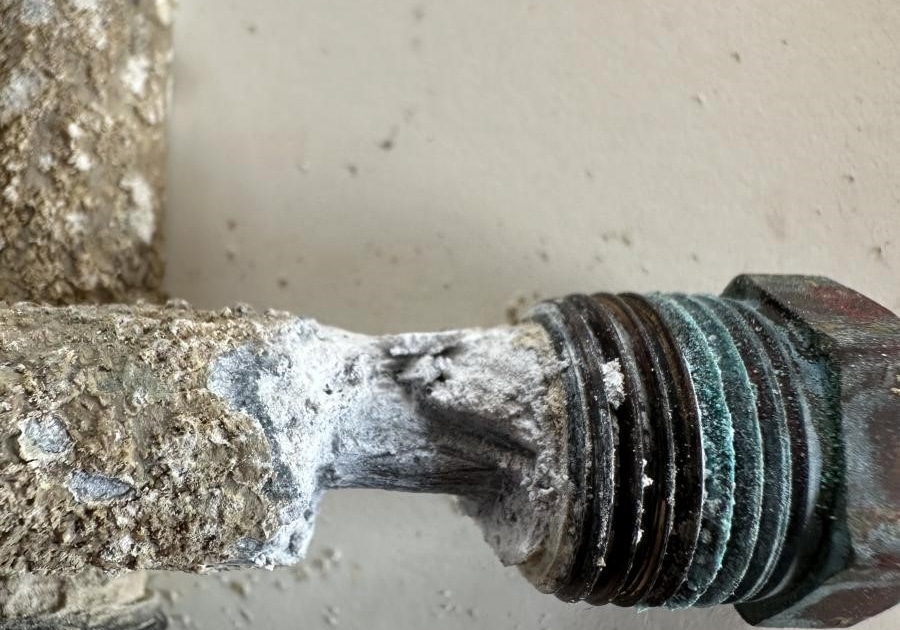
If you have a stuffing box, also known as a packing gland, ensure that it still contains plenty of paraffin-impregnated flax packing. When underway, it should drip every 2–3 seconds. At the dock, you can tighten it to a drip every 10 seconds or less. If the tightening nut is nearing the end of its threads or the shoulder of its male fitting, it’s a sign you’re running out of adjustment. This is your inspection point! Check how much room is left to adjust and stop the flow. If minimal, plan to repack it during your next haul-out.
For those with a dripless system, inspect the feed hose and its inlet/seacock to ensure they are not clogged with growth. A dry or improperly fed dripless shaft seal can fail catastrophically, allowing a significant amount of water into your boat very quickly.
2. Vessel Anodes
Galvanic corrosion is both insidious and relentless. Your boat is essentially a giant battery, with the sea acting as its electrolyte. To protect against disintegration, your vessel should have a variety of anodes.
Inside your engine’s cooling system, anodes protect internal components and must be checked at least annually. These are out of sight out of mind, but are very important!
Shaft and propeller anodes are easier to spot. If you hire a professional, most bottom-cleaning services will check these anodes and update you on their condition.
If your bonding system is set up properly, all bonded components should connect to a large anode mounted below the waterline. Check this anode during your inspections.
3. Engine Bay Blowers
Powerboaters with gasoline engines that don’t check these are quickly taken out of the gene pool, but sailors with their diesel engines have more important things on their minds, like how good they will look sailing by the marina flying their new spinnaker.
Typically you will have a blower for pulling in fresh air from outside the boat and another for pushing old air from the engine bay out of your boat. Blowers play a critical role in ventilating your engine bay and removing carbon monoxide if there are exhaust leaks.
The blowers should activate when you turn on your engine accessories switch. As part of your inspection, turn on the switch, then check the blower motors. Either observe the blades spinning or place your hand on the motor housing to confirm operation.
4. Hit All Your Zerks With Grease!
Your zerks, or grease nipples, are another commonly overlooked maintenance item, you don’t want to end up with Neglected Nipples. Keeping them fed is crucial for maintaining the longevity of your vessel’s mechanical systems. Friction, corrosion, binding, and mechanical failure will be your lot if you overlook these items. Make a check list of all the equipment on your boat that has grease zerks with a diagram of their locations.
5. Expiration dates
As a marine surveyor, I’m often surprised by how many boats have expired safety items. Law enforcement agencies love to write tickets for these oversights. Ensure you check all items with expiration dates, including:
- Flares
- Documentation and registration
- Fire extinguishers
- Life raft inspections
If your boat has a fixed fire-extinguishing system, it requires an annual inspection. Portable extinguishers must be replaced if they are more than 12 years old from the stamped manufacture date.
6. Fuel System Leaks (Engine And LPG)
Diesel leaks are an easy issue to intentionally overlook. That little bit of diesel leaking down there is actually cleaning last years oil leak out of your bilge, so it’s probably doing some good… Unfortunately the coastguard is not so likely to see it that way. Diesel is a form of oil and 33 CFR § 151.10 specifically prohibits the discharge of any oil or oily mixtures.
Check all your fuel lines, fuel filters, and any fuel system fittings. Watch out for corroded hose clamps, cracked hoses, or corroded fuel valves. Fuel water separators are prone to leaks. Usually the easiest way to filters with this problem is to just replace them.
7. CO Monitor and Smoke Detection
During my marine surveys a lot of boat owners are surprised to learn that yes, you are required to have a CO monitor on your boat.
ABYC A-24.6.1: “Carbon monoxide detectors shall be installed on all boats with an enclosed accommodation compartment(s).”
Same goes for a smoke detector, referred to as a “fire detection device”.
ABYC 4.6.1: “A fire detection device to alert boat occupants to the outbreak of fire shall be installed in boats with more than one habitable space…”
While ABYC standards are technically voluntary, good luck arguing that with your insurance company. Test these devices annually to ensure functionality.
8. EPIRB Test
Your EPIRB unit should have a test button on it. Test it at least once a year to ensure it will function when needed.
9. Clean Your Battery Terminals
Corroded battery terminals can cripple your electrical system. This is especially true for starting batteries, which are often unprotected by fuses or breakers. Corrosion increases resistance, leading to inefficiencies, power loss, and potential fire hazards.
Remove the connections, clean the terminals and wire end connectors with a wire brush, reassemble everything securely, and coat the terminals with a corrosion inhibitor such as Corrosion Block. This non-conductive solution is safe for plastics.
10. Bonding System Connections
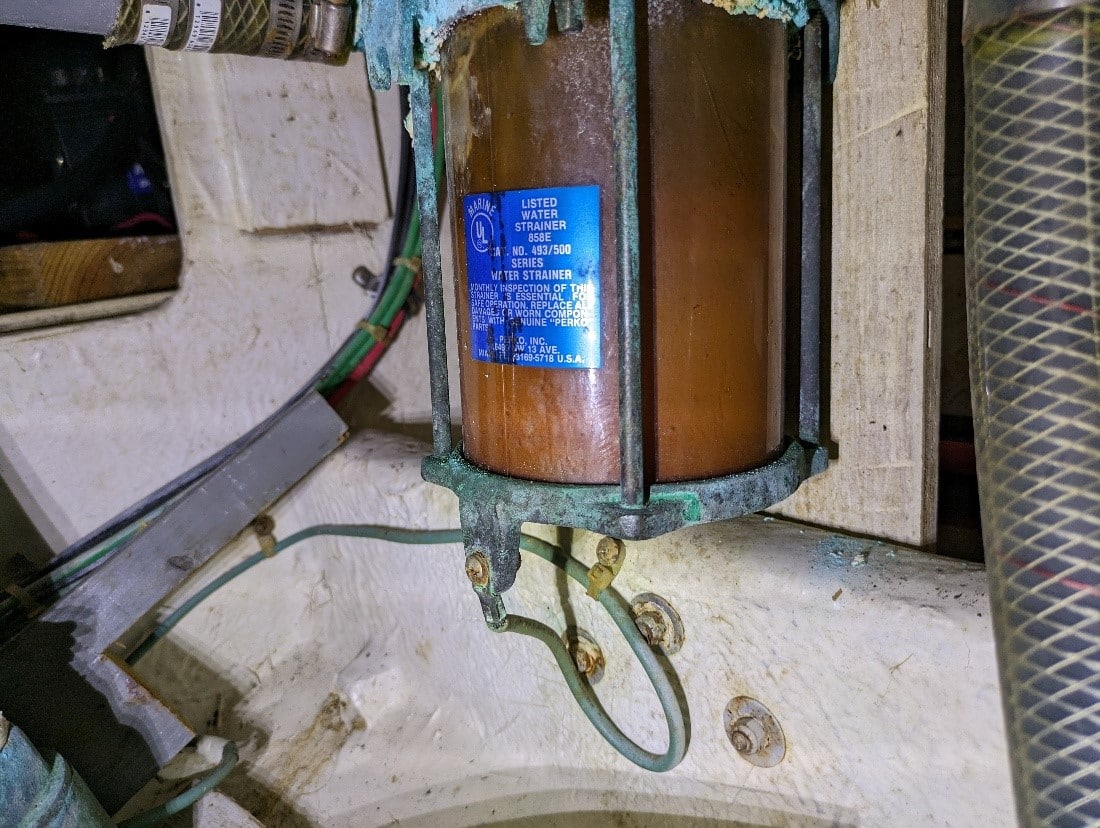
If you work this into your maintenance schedule you will be ahead of 99% of boat owners. Although strange things can happen in a bilge it usually comes down do issues with bonding. So it’s important to go through your bilges and check all your connection points for your bonding system. Every metallic component in your boat that touches water should be connected to your bonding system. Seacocks, through hulls, metallic raw water strainers, your engine, fuel tanks, steering components, thrusters, etc.
What people always fail to do is make sure these connections are kept fresh and clean. Every marine surveyor can tell you that nearly every boat they have been on, unless it’s a very new boat, has some level of deterioration in the bonding system. Being in the wet corrosive conditions of the bilge the connection points of the bonding system are destined to become corroded, and just like with your battery terminals this results in electrical resistance. This resistance diminishes the benefits of your bonding system and your anodes.
Disconnect the bonding wire, clean the connector and the attachment point with a wire brush or emery cloth until shiny, reassemble tightly, and apply a corrosion inhibitor to the top of the connector and its fastener.
Bonus monthly items
Float Switch Functionality
It’s quite common for the float switch on a bilge pump to fail before the pump itself does. Simply hitting the manual override on the bilge switch isn’t enough to confirm that your bilge pumps are functioning properly.
The easiest way to check the float switch is to flood your bilge with a dock hose. Not only does this perform a function test, but it also helps clean out your bilge. If your bilge is too shallow to comfortably flood, you can use a Tupperware container filled with water to immerse your bilge pump. Some bilge pumps can also be tested by turning them upside down; those with external mechanical float switches will activate when flipped.
Shore Power Cord Connections
What people always fail to do is make sure these connections are kept fresh and clean. Every marine surveyor can tell you that nearly every boat they have been on, unless it’s a very new boat, has some level of deterioration in the bonding system. Being in the wet corrosive conditions of the bilge the connection points of the bonding system are destined to become corroded, and just like with your battery terminals this results in electrical resistance. This resistance diminishes the benefits of your bonding system and your anodes.
Disconnect the bonding wire, clean the connector and the attachment point with a wire brush or emery cloth until shiny, reassemble tightly, and apply a corrosion inhibitor to the top of the connector and its fastener.
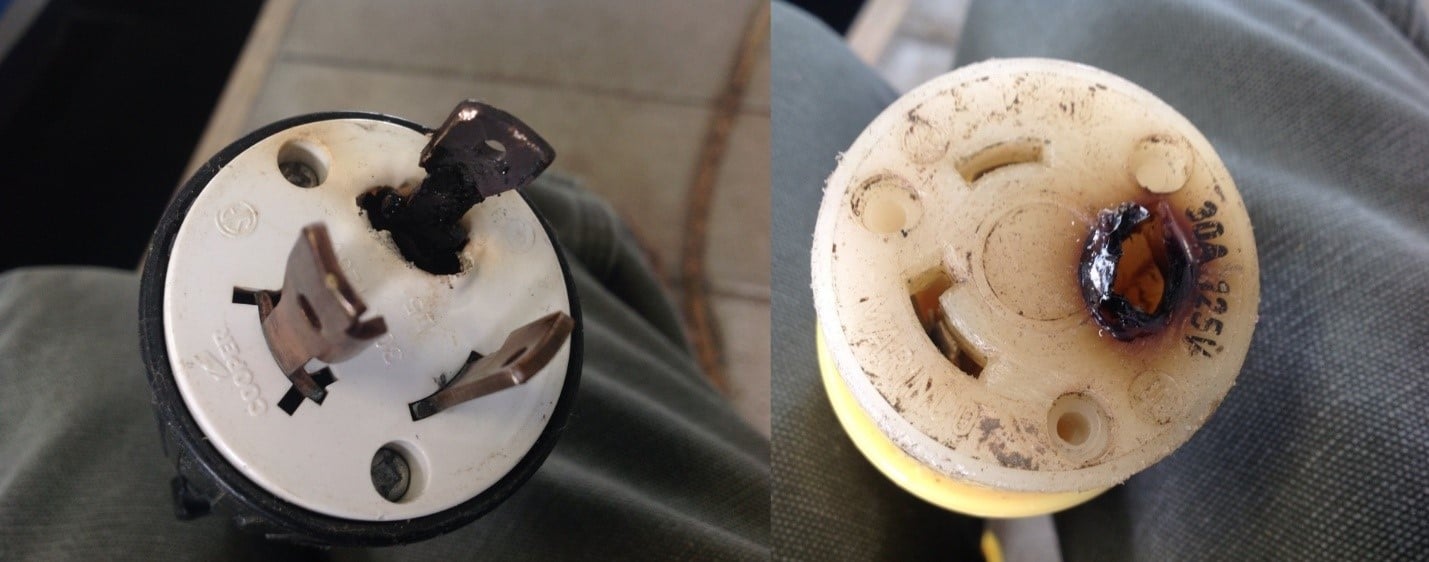
Problems with shore power cords are an issue I encounter frequently as a marine surveyor. One of the main reasons is that shore power cords are expensive, but this is not an area where you want to cut costs. The number one cause of boat fires is the AC electrical system, and shore power plugs are among the first components to corrode and develop enough resistance to scorch, melt, or even ignite.
You should inspect both the male and female sides of your shore power plug at least once a month for signs of corrosion, scorch marks, melted plastic, or anything else that seems out of place. If you notice any damage, replace the cord immediately—it’s not worth delaying. I’ve seen brand-new yachts burned down to the waterline because of faulty shore power connections.
This same level of caution should apply to your entire AC system. If anything seems off—such as unusual power issues with your shore power, generator, or inverter—have an ABYC-certified marine electrical technician inspect it promptly.


