ANCHORING WITH LINES ASHORE
What you need to know about Mediterranean-Style Anchoring
Anchoring where space is tight
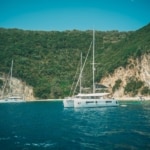
Attaching a long warp (line) to a fixed point ashore is, in general, a very practical method of mooring — and one worth having up your sleeve. Mainly used in the Mediterranean as the standard system, this method allows for several boats to moor in a short stretch of space, but it can also be useful anywhere, especially when there’s no dock or marina but only a bare undeveloped shoreline.
Briefly, this maneuver, known as “Med mooring” or “Mediterranean-style anchoring”, consists of anchoring close to the shoreline, and after backing down on the anchor (or mooring bouy if available), you secure one or more mooring lines from the stern of the boat to a fixed point ashore.
Anchoring v. mooring, what’s the difference? As a quick refresher on terms, anchoring is dropping a heavy object (an anchor) from the boat that secures in the seafloor. Mooring, on the other hand, refers to tying or securing your boat to a fixed object, such as a mooring buoy or dock. In this case you’re doing BOTH!
Here are some tips and techniques that will make your anchoring with lines ashore, using long warps, more efficient.
Mastering the Med-style mooring is essential for boat owners and on charter boats, in all boating areas, especially the Mediterranean. Learn more about anchoring in our Anchoring a Sailboat course, also included in the comprehensive Bareboat Charter Master course bundle.
Setting up
As with most things in sailing, preparation for anchoring with lines ashore is the most important element to ensure success. First of all, you need to select a suitable location (and there are a few things to consider when choosing your anchorage position).
Depth for Anchoring:
You must do a quick reconnaissance to assess the depth where you want to drop anchor, as well as close inshore. You can’t anchor too deep, but you can’t anchor too shallow either, as your rudders might touch the bottom as you go astern toward the shore.

Mooring:
Next, look for a specific point ashore that you’ll be able to tie to. It could be a well-placed tree, or a rock of a suitable shape, so that you can tie the mooring line to it without risk of it slipping off.

Warps:
A “warp” is a long line used to moor or secure a vessel to a fixed point. Ideally, it’s best to use floating mooring lines, but they’re not mandatory. They are easier to send ashore, and because they float, there’s less risk of them getting caught in your propellers. The mooring lines must be long – longer than you’d think at first sight – because the final position you choose could be anywhere between 6 and 45 meters (20 to 150 feet) from the shoreline.
You can attach mooring lines together to increase the overall length, but even then, they must be long. A pair of docklines probably won’t be enough. If you’re sailing a charter boat, make sure that the charter company provides you with at least two long warps.
Most likely, your long mooring lines will be deployed from the boat to the shore at an angle, so be careful not to secure the them on the wrong side of the pushpit or a stanchion, otherwise you might run the risk of ripping them out of the deck.
Two long mooring lines are the best solution to prevent the boat from swinging in the event of a wind shift. If you have the wind on the beam, the first line you run ashore must be the windward one.
When using very long mooring lines, you’re recommended to attach a series of floats to them to make them more visible to other boaters.
Preparation
Prepare the maneuver with the crew and communicate precisely what each person’s role is. There are a few important points to consider:
- Will you swim the mooring line ashore or will it be taken in the tender?
- What is the shoreline like? If the shore is rocky, shoes will be required for the person responsible for the mooring lines. Beware of sea urchins!
- Who will be the most suitable and competent person to undertake this operation?
- Will the chosen person be able to make a bowline or a round turn and two half hitches without making any mistakes?
- Who will be in charge of anchoring and do they know all the relevant procedures?
- What are the wind conditions? Winds from fore or aft are easy to detect, but if the wind is on the beam, you require a certain level of boat handling experience. If the wind is blowing at more than 7 knots, you won’t have much time to perform your maneuver, especially in crosswind conditions.
- As a side note (or if you’re planning a charter sailing vacation), catamarans are easier to handle than monohulls when you have to keep a stationary position, like in a situation similar to this.

Swim or use tender?
There are two ways to get the mooring lines ashore: by swimming or using the tender.
Swimming:
Although swimming is fun and enjoyable from the beach, the wind is still a decisive factor (not to mention the water temperature). Swimming on the coast can take time and it can be difficult for the helmsman to remain stationary in the intended location if the wind is on the beam. Make sure your person is a competent swimmer who can also tie an effective knot. Remember to protect your feet once on the shoreline.
In the event of crosswinds, once the boat has backed down on the rode, and got the anchor dug in to its final position, the swimmer can take the end of the windward mooring line, which has previously been cleated off outside the pushpit, and then swim it to shore. A crew member will assist the swimmer by uncoiling the mooring line, reporting to the helmsman on the progress of the maneuver, and keeping the line away from the propeller. Once tied off ashore, the crew member back on board will take up his end on the cleat.

The swimmer can then return to the boat and take the leeward mooring line (in the case of a crosswind) ashore and secure it.
Even in the absence of crosswinds, you should consider that wind conditions can change. Also, it’s always wise to have your two mooring lines set at an angle.
In the dinghy:
If you plan to use the tender to pass a long mooring line ashore, you’re going to have a bit more flexibility in relation to the wind. You can either pass the entire mooring line (not cleated-off) using the tender once the boat is in position, or in the case of trickier wind conditions, you can first use the tender (again with the entire mooring line on board and not cleated-off on the boat) before dropping the anchor.
In difficult wind conditions (wind on the beam), start by choosing an appropriate anchorage position and the right points for mooring to. Stop the boat a way off the chosen location, then send the tender ashore and both mooring lines, with the appropriate crew. The crew on board the tender will secure the windward line to the selected point ashore and bring it back to your intended anchorage position. Once this operation is completed, the helmsman can give the order to anchor, bringing the boat astern, and back to the tender, and attach the windward mooring line onto a cleat. Then, the crew in the tender will perform the same maneuver with the leeward mooring line.
If the wind is favorable, the conditions are good for anchoring, set the boat to its final position and perform the line-handling maneuvers using the tender. As a reminder, a catamaran is easier to maintain in a stationary position because of its maneuverability under engine.
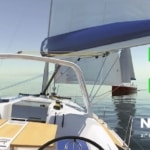
Play this tutorial detailing how to use the tender to get a long mooring line ashore.
TENSION UP
Once the long mooring lines and anchor are set, it is advisable to tension everything up, in order to prevent the wind from pushing the boat against neighboring boats that have done the same thing as you. To do this, using the engine, back down on the anchor, take up the slack from the mooring lines and cleat them off. Or, move ahead on your anchor by taking the slack in the anchor line to the windlass, which will put more tension in your mooring lines.
Finally, if possible, it’s always a good idea to dive on the anchor to ensure that it is dug in and to check that the length of your mooring lines is sufficient.

ADDITIONAL ANCHORING TIPS AND TECHNIQUES
It is essential to ensure that the anchor is properly held on the bottom. In crosswinds you cannot take the risk that the anchor will drag and the boat end up on the shore.
Setting up:
Regardless of the mooring line, you need to use a 5:1 ratio (ratio of horizontal distance and water depth). There is a simple way to estimate this by using the length of the boat as a unit of measurement when you look at the water. It is much easier to visualize 5 boat lengths than a distance of 65 m or 200 feet.
-If the depth is 6 meters (20’), you will need 5 x 6 m. For a 40-foot (12 m) boat you’ll need about 3 boat lengths.
-For a depth of 18 m (60’), you will need 5 x 18 m. For a 40-foot (12 m) boat, this means about 7-8 boat lengths.

- You can see that when the depth is greater at the anchoring position, it becomes more difficult to maintain this 5:1 ratio. But you mustn’t modify this ratio. For more information on completing this approach, click here.
- To anchor, position yourself at an appropriate distance, with the stern facing the shoreline. Drop the anchor, but do not start coming astern until it has hit the bottom. Then start backing down. If you start to go astern too early, the ratio will be compromised.
- The crew member in charge of the anchor must notify the helmsman so that he can control the speed of the boat so that the anchor does not drag on the bottom. The windlass operator must be fully-informed on this point. The anchor chain must be at a steep angle. If you use an anchor rode, the rope should not be under tension when the boat is in motion. The windlass operator can give instructions to slow down or keep going astern as required.
- Once set in its final position, the helmsman informs the windlass operator that they must stop letting out any more anchor line and that they can begin to take up the slack. The helmsman can then leave the engines in slow astern to maintain station with the anchor line taut until the mooring lines are secured ashore.
Tidal Considerations when Anchoring:
All the points mentioned above imply knowledge and consideration of the tide. When the water level changes with the tide, you may need to ease or tighten the anchor or the mooring lines. Also, make sure that in the event of a change of tide, you have taken this into account in your preparation.
Techniques to use when anchoring short-handed:
If you are sailing short-handed, there is still a way to perform the Med-style mooring.
Once you have chosen your anchorage position, you (or your crew) can take the mooring line ashore with the tender and secure it to a tree or rock. This will be your windward mooring line. Bring the free end back towards the boat and attach a float (buoy or fender, etc.). This will allow the free end of the mooring line to remain in the vicinity of the chosen location long enough to allow you to complete the maneuver.
Once your partner is back on board, anchor at the chosen point and move back towards your float. Pick up the free end and tie it off onto a cleat. Put a little tension on the mooring line to stay in position, then you can take your time getting your leeward mooring line ashore and getting back to the boat. Cleat this off, tensioning the mooring line.

Author
You might also like


Last updated on July 16th, 2025


NauticEd is a fully recognized education and certification platform for sailing students combining online and on-the-water real instruction (and now VR). NauticEd offers +24 online courses, a free sailor's toolkit that includes 2 free courses, and six ranks of certification – all integrated into NauticEd’s proprietary platform. The USCG and NASBLA recognize NauticEd as having met the established American National Standards. Learn more at www.nauticed.org.

The NauticEd Vacations team are Expert Global Yacht Charter Agents – when you book a sailing vacation or bareboat charter through NauticEd, we don’t charge you a fee – we often save you money since we can compare prices from all yacht charter companies. PLUS, we can give you advice on which destination or charter company will suit your needs best. Inquire about a Sailing Vacation or Charter.